I have a hate-hate relationship with medium toned oak. It’s my least favorite tone of wood, and of course our house is full of it since it was ‘redone’ in the late 80′s/early ’90s. We have wood railings that separate our step down family room from our kitchen, in-need-of-replacing cabinets in the kitchen in the same tone, and a railing and spindles in that hideous oaky tone.
We’re currently working on a $0 DIY budget since we have to save up for some bigger fixes and projects and we’ve spent a good amount of moolah projects this year. Inspired by several DIY blogs and magazines where I’ve seen similar finishes on railing and spindles I decided to tackle this fun DIY project with a $0 budget.
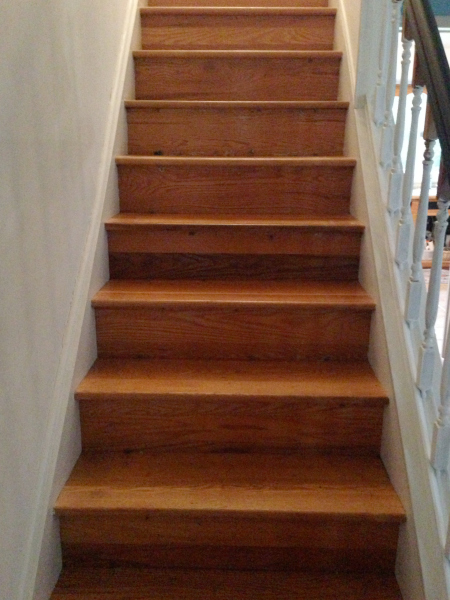
I don’t have a look at the before of the wood, but it’s very similar in tone to the steps you can see in this photo.
Here’s what you’ll need to transform your stairs:
-Sandpaper
-Espresso stain (or stain color of your choice) (From Home Depot here.)
- Fast drying Polyurethane in a semigloss finish
-Rags or stain sponges
-1 inch angled paintbrush
-Semigloss paint in white (or color of your choice)
-Optional: tape
You’ll also need to loudly remind your family to NOT TOUCH THE RAILING when they go up and down the stairs. It became a constant refrain in our house.
How to Refinish your Stair Railing and Spindles
1. Clean
Start with a thorough cleaning of your railing and spindles. I used Method cleaner to spot clean sticky messes, and just warm water and a few drops of dish soap to clean. Use a damp rag (soaking it is a bad idea). Now you have to let it dry.
If you have spindles like ours that get thin near the bottom or have any type of grooves you can use a compressed gas duster![]() that is used for cleaning electronics to get into the tiny spaces that collect dirt and dust. I tried everything from Q-tips to toothpicks, but this worked the best for the small crevices we had.
that is used for cleaning electronics to get into the tiny spaces that collect dirt and dust. I tried everything from Q-tips to toothpicks, but this worked the best for the small crevices we had.
2. Prep
Start by sanding down the railing and any parts that will be stained. Some people choose to stain everything while others may choose to only stain the railing. It’s up to you what you want to final product to look like.
Once everything is sanded down you will have to wipe down every surface with a damp cloth. You may have to clean any small crevices out again, too.
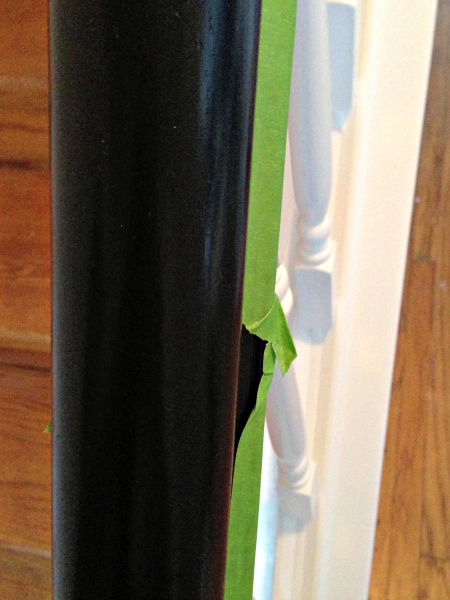
Decide where you’re going to start next. I preferred starting with staining the railing first. If you plan to use tape, tape off the spindles at the top so when you stain the underside of your railing it doesn’t get stain on your spindles. If you choose to do the opposite order just switch the directions below.
3. Stain
To stain you can use a rag or stain pad, or even an old (but clean) sock. Don’t use towels-they have too many fibers to leave a smooth finish. We had stain pads on hand so I used them. Now you’ll want to open your stain and stir it. Don’t be James Bond-stain shouldn’t be shaken, only stirred.
Now you can get to staining! If you’ve never used stain before you’ll want to work with the grain of the wood. If you’re going for a look where the wood grain peeks through you’ll want to go back over the stained areas to remove the excess with a clean rag/sock/pad. If you want a darker look like the dark finish we have you should go over it very lightly. The key here is to almost ‘paint’ the wood with the stain to create a super dark and glossy finish.
The stain will need to dry (read the directions on your can) before you can reapply. I use my phone’s alarm to remind me to apply the next coat. The darker and deeper you want to finish the more coats you’ll do. There’s no exact since to this, just continue working on it until you’re satisfied with the results.
When you like the color you are ready to finish it off. If you’re using heavier coats you should give the final coat of stain about 24 hours to dry. Having a fan in the area helps, and constant reminders to family and friends also helps keep it untouched. If someone does touch it while your stain is still damp or it’s not finished you can spot stain those areas.
Once you’ve given it a day to dry you’ll want to coat any stained ares with polyurethane. I had on hand fast drying poly and that helped speed up the project. Before you start adding the protective layer do one last removal of excess stain with a clean and dry pad/rag/sock. This will get up any excess that didn’t dry.
Follow the directions on your poly container. You’ll want to apply 3-4 coats. Once it’s dried you’re set to move on to the spindles.
Post stain pretty:
4. Paint
Paint in progress
When you’re painting wood it’s important to use a primer first to ensure that none of the wood peeks through. A good primer (we had Kilz on hand) provides a great base for your paint, no matter what color you choose.
Since our house is a fauxlonial (faux colonial) and we have a traditional style white made the most sense for us. You may choose another color especially if you have colored trim throughout your home.
Simply use your angled paintbrush (angled is key here!) to prime the spindles and any areas you’ll be painting white. For us this included the wood and trim below the spindles and at the back wall where the railing meets a piece of wood. You will likely need two coats of primer to ensure an even finish. Since spindles are so thin you’ll want to work slowly and use very little paint on your brush. This will keep your finish from having drips or having a weird texture.
Read the directions on your primer, but in most cases once it’s dry you’re ready to paint! Painting is the same process as priming, only this time it will be the top finish. for our spindles it took 3 coats, though the some of the trim pieces took 4 coats.
Once you’re done and the spindles have dried you’ll want to back in with a small craft paintbrush and a stain pen to correct any noticeable areas. For us this was where our spindles met the railing on the top. since they get so thin it was impossible to make the transition smoothly with a bigger brush.
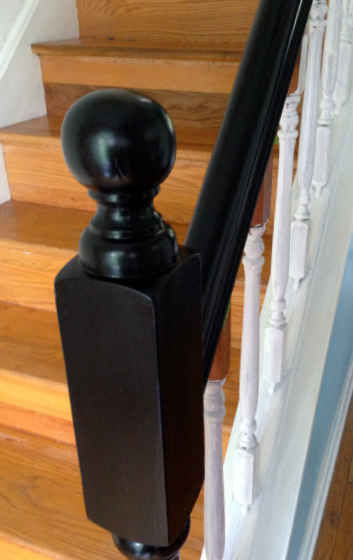
While the process is time consuming the results are well worth it!
The finished railing and spindles!

You can see in the above photo I’m working on painting the walls, and the steps, and the floors. (phew!) We did a sort of test patch in front of and behind the railing because the white was blending in too much. We found that once we painted the walls it added a nice backdrop to make the white stand out. If your walls are white the railings may get lost, so you might consider another color like a light gray.
Next up? These stairs and the walls in the hall (partially done already). On my list:
- Finish pulling out a bajillion staples
- Fix squeaking steps
- Sand steps, walls, and stringers (the wood that goes on either side of the steps)
- Paint white semigloss on risers, trim, and stringers
- Paint walls in Golden Mushroom (we’re using this in the majority of the house)
- Stain treads to match railing
Total Cost of the Makeover: $0
I’m in love with the way it looks, now I just need to get the rest of the house to match how awesome it looks.
Kelly
Don’t miss a single post! Subscribe to my RSS feed or sign up to have my posts delivered to your email.


Pingback: 2013: A Year in Review