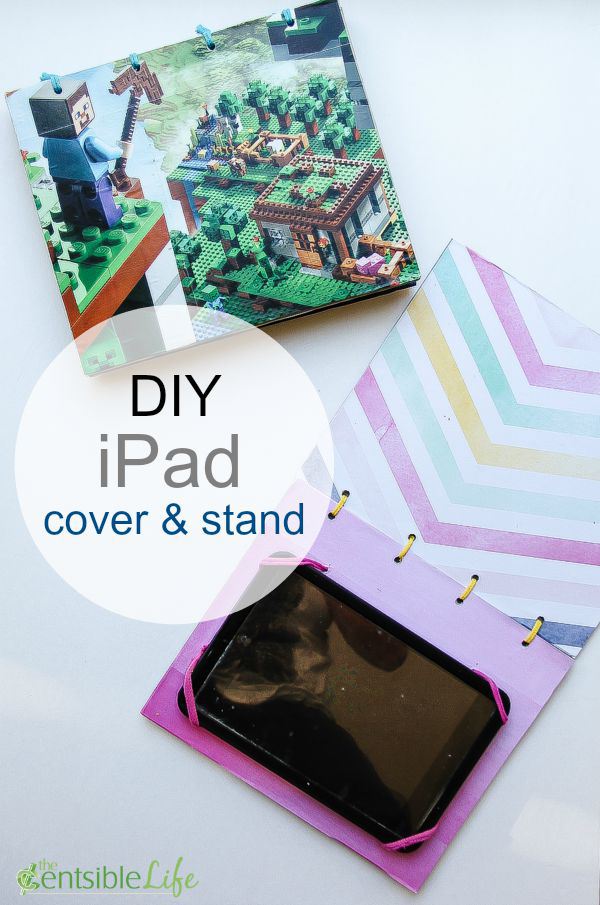
Not long after summer vacation began, Marisol was crafting one morning and decided to make a cover for her iPad.
She found a couple of pieces of chipboard with pre-cut holes for an album amongst our crafting supplies, covered each piece with Duck tape and then used binding rings to join the two pieces together. She asked for my help to poke a few holes in one piece of board and put some ties in there to hold her iPad in place. It was then that we realized that this wasn’t just a cover, but if we flipped the lid over the iPad would stand up too! That makes it much easier to watch videos, read, or watch her favorite shows at the table or in bed without having to hold the iPad.
How To Make DIY iPad Cover & Stand
It was a couple of months later that we realized the chipboard was starting to buckle just a little, so we decided to whip up a couple more covers (because of course she insisted on her brother having one too). Only this time we glued two pieces of chipboard together to make each side of the cover.
Supplies needed:
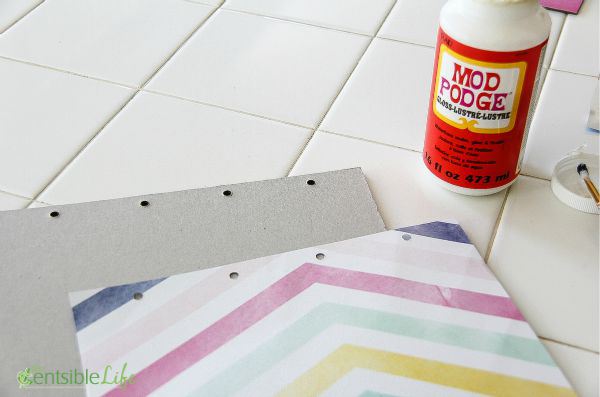
- Chipboard
- Scrapbook paper or Duck tape
- Mod Podge
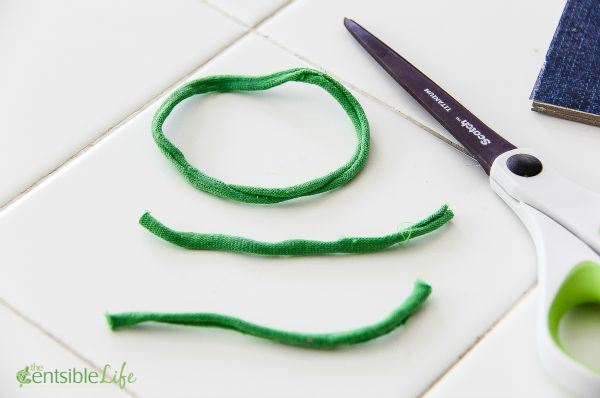
- Crafting loops or elastic - anything that will stretch over the iPad to hold in place
- Book rings or more crafting loops - to tie the front and back cover together
- Drill with drill bit
You can either use Duck tape or scrapbook paper for this project. Choose your colors and then glue or adhere whatever you choose to the chipboard. If you choose to use paper, you can pre-cut and measure holes to match those already in the chipboard album. If using Duck tape, you will need to poke a hole through once the Duck tape has been adhered to the chipboard.
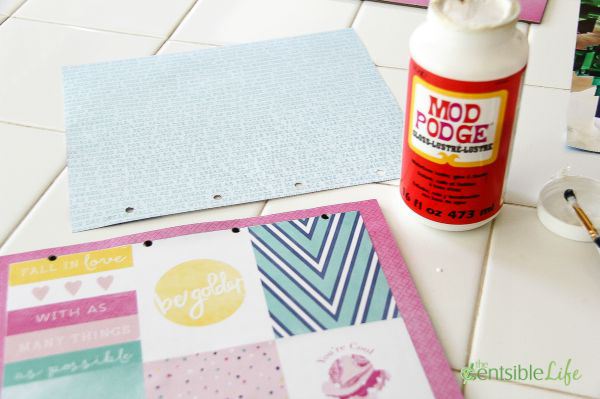
Set your cover aside to dry completely, and then if using scrapbook paper apply a layer of Mod Podge over the top to protect the paper. Allow it to dry about 20 minutes in-between coats, and you’ll want to add about 2-3 coats.
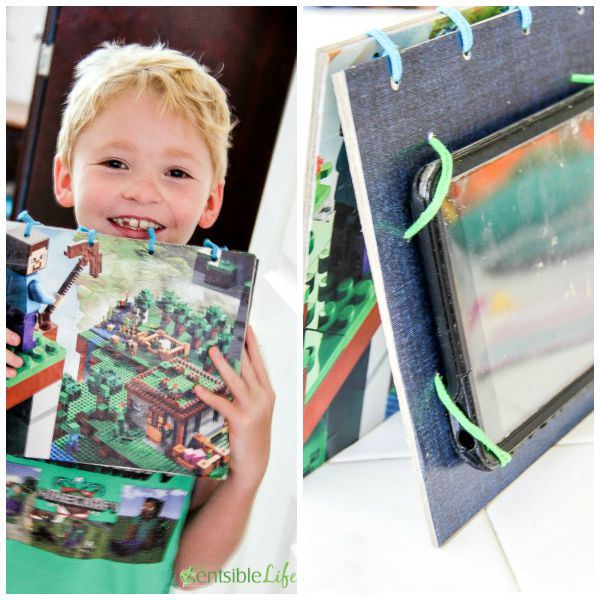
Marisol obviously chose scrapbook paper for her new cover, but Flynn decided he wanted to use a Minecraft poster he’d gotten out of a LEGO magazine, along with scrapbook paper for his because he wanted a Minecraft cover … of course.
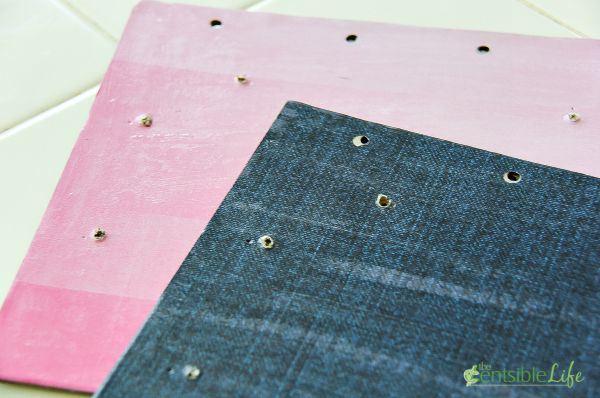
Once both sides of the chipboard cover are completely dry, place the iPad over the top in the center of the back cover and mark out where you need the straps to go.
Tip: place the markings underneath the iPad so that the straps curl over the top and aren’t flush with the sides. This will make them more secure.
This next part is for the grown-ups to help with. Drill holes through the chipboard, and then the kids can help you tie the straps into place.
And there you have it.
Two happy kids with homemade iPad covers that double as stands.
Happy crafting.
Tonya

Share your thoughts!